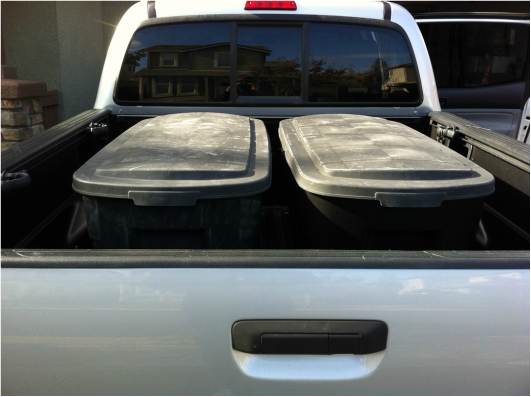
Here is an easy and cheap way to add some extra storage to your Pickup Truck!
Visit my Instructable for more info.
Visit my Instructable for more info.
|
Here is an easy and cheap way to add some extra storage to your Pickup Truck!
Visit my Instructable for more info.
0 Comments
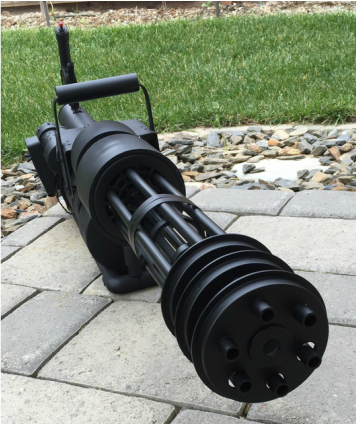
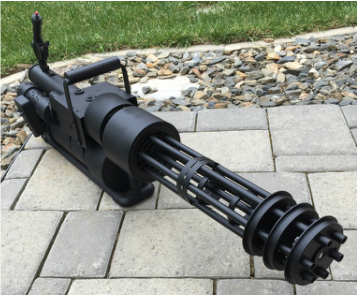
Fixed my Minigun and re-painted it. I originally built this about a year ago and it needed repair. This was a fun overall project that took about two months to build. Too complex to describe here in detail, but there are many areas on the Web that go thru how to build Airsoft guns and different versions of this gun in general. I used a store bought mini Airsoft machine gun and cut it down to fit inside this frame to shoot the BBs. I also used an old motor and battery from a rechargeable drill to spin the turret. Everything else is scratch built.
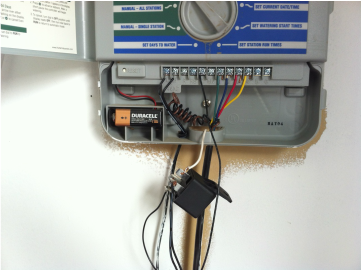
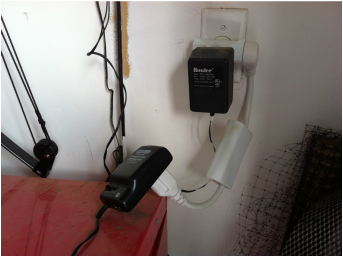
Today I finally added Z-wave control to my existing yard sprinkler system and garage door opener. I use a low-cost (mostly) Open Source system called InControl (incontrolha.com) for my home automation.
This was pretty easy to do and I completed both mini projects in the garage today in about 2 hrs. The pictures above give you the idea - get a Z-wave 120 v. appliance switch (about $40), a 12-volt relay switch (about $5) and a 120 v. to 12 v. converter (about $20). You could skip the converter and use a 120 v. relay also. For the sprinkler system, all I'm doing is controlling the valve common (negative) wire with the relay/appliance switch. I then set up all kinds of programs on the sprinkler controller and then used scenes in my Z-wave controller (InControlHa) to turn the common wire on and off at set times, thus controlling the sprinklers. I used a very similar setup for the garage door opener. Except this time, the relay is controlling the bell switch on the door opener. Then I just set up a scene to turn on the Z-wave appliance switch to throw the relay which activates the door opener. I also had to set up another scene to detect when the appliance switch goes on to automatically turn it off. Very nice! Cool to control the garage door from anywhere when you have your iPhone or computer handy.
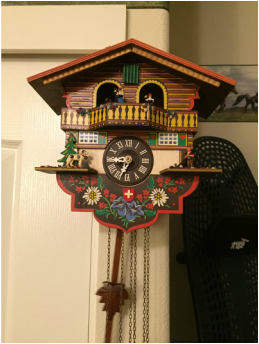
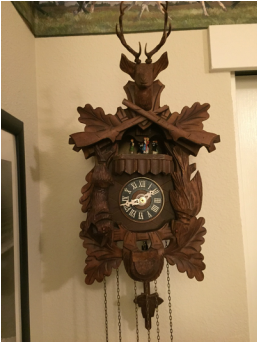
Completed the restore of both of these clocks this past week.
The Chalet version was not too bad - just had to clean/re-oil, some small work on the music box timing with the governor and then some minor back and forth on the correct weights to run the clock. It did not come with weights when I purchased. Eventually, I found that 630 g. weights were needed to run it at optimum. That is pretty heavy for a one day clock. But even after cleaning, the lighter weights just did not work. The Hunter's clock too more work this time. It was missing the proper music box governor trip wire to make it play music after the Cuckoo call. I had to purchase the trip from Timesavers and retrofit it on. This clock also has a side mount music box that uses chains thru a pulley system to make the dancers work. It was hard to get it all to work, about 40 hrs. The clocks that have a movement built with a dancer platform in the movement itself (like the Chalet clock) is MUCH easier to work. After fixing the music box, then all I had to do was basic clean/re-oil and a little bit of work on the Cuckoo bird door. A nice clock that was worth re-storing. |
Steve UhlWelcome to my projects blog! I like to make and tinker with a lot of different ideas. I like to use Adobe Illustrator / Photoshop, my Die Cutting machines (Silhouette Portrait and Cricut Explore), my 3D Printer and my garage workshop to build my projects. Archives
January 2018
Categories |
 RSS Feed
